Why Use Studio Monitors In a Lab Setting
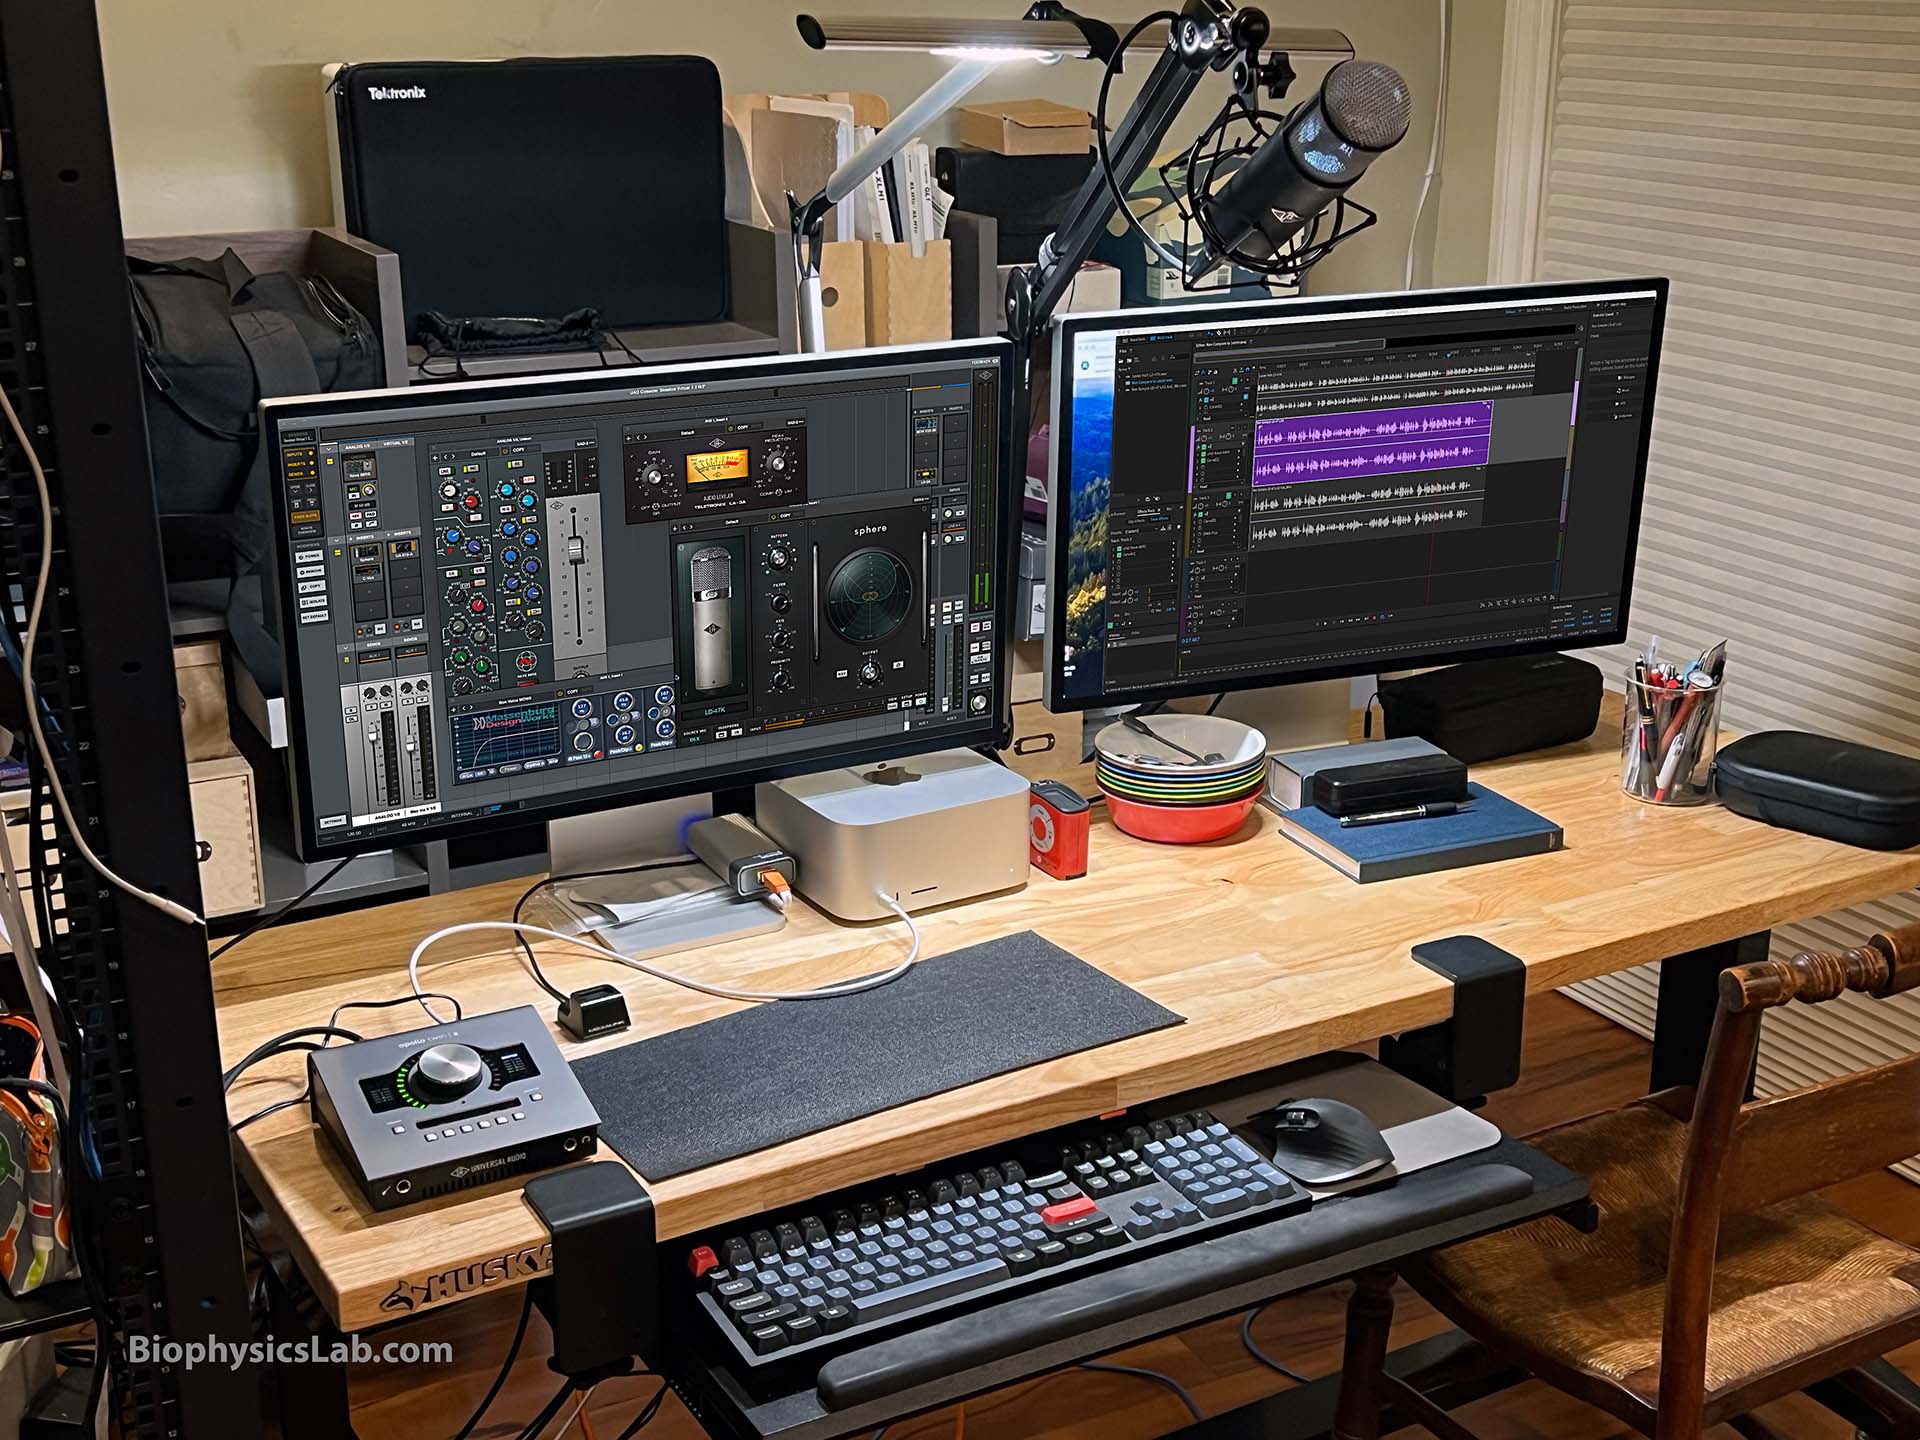
BiophysicsLab creates audio and other multimedia to share project skills and technology transfer while clarifying complex concepts through storytelling. Here is one of my audio recording/publishing systems where the left/right 1/4 Tip-Sleeve (TS) 2-wire mono female connectors are circled in green :

Studio monitors provide an important playback alternative to headphones during production.
- Unlike home entertainment speakers, the studio monitor must be mobile, have a large physical size, and reproduce rapidly changing power and frequency range – all while creating no noise of its own – such as from a power supply.
- Unlike headphones, studio monitors offer a different perspective on sound as the speaker’s sound interacts with walls, floors, windows, etc… The production process should consider how the final media sounds in a group setting.
I describe my approach to building a set of studio monitors, starting from a Yamaha Stagpas 500 PA system, to meet these requirements, working backward from the completed system to initial wire cabling.
Yamaha Stagpas 500 PA system
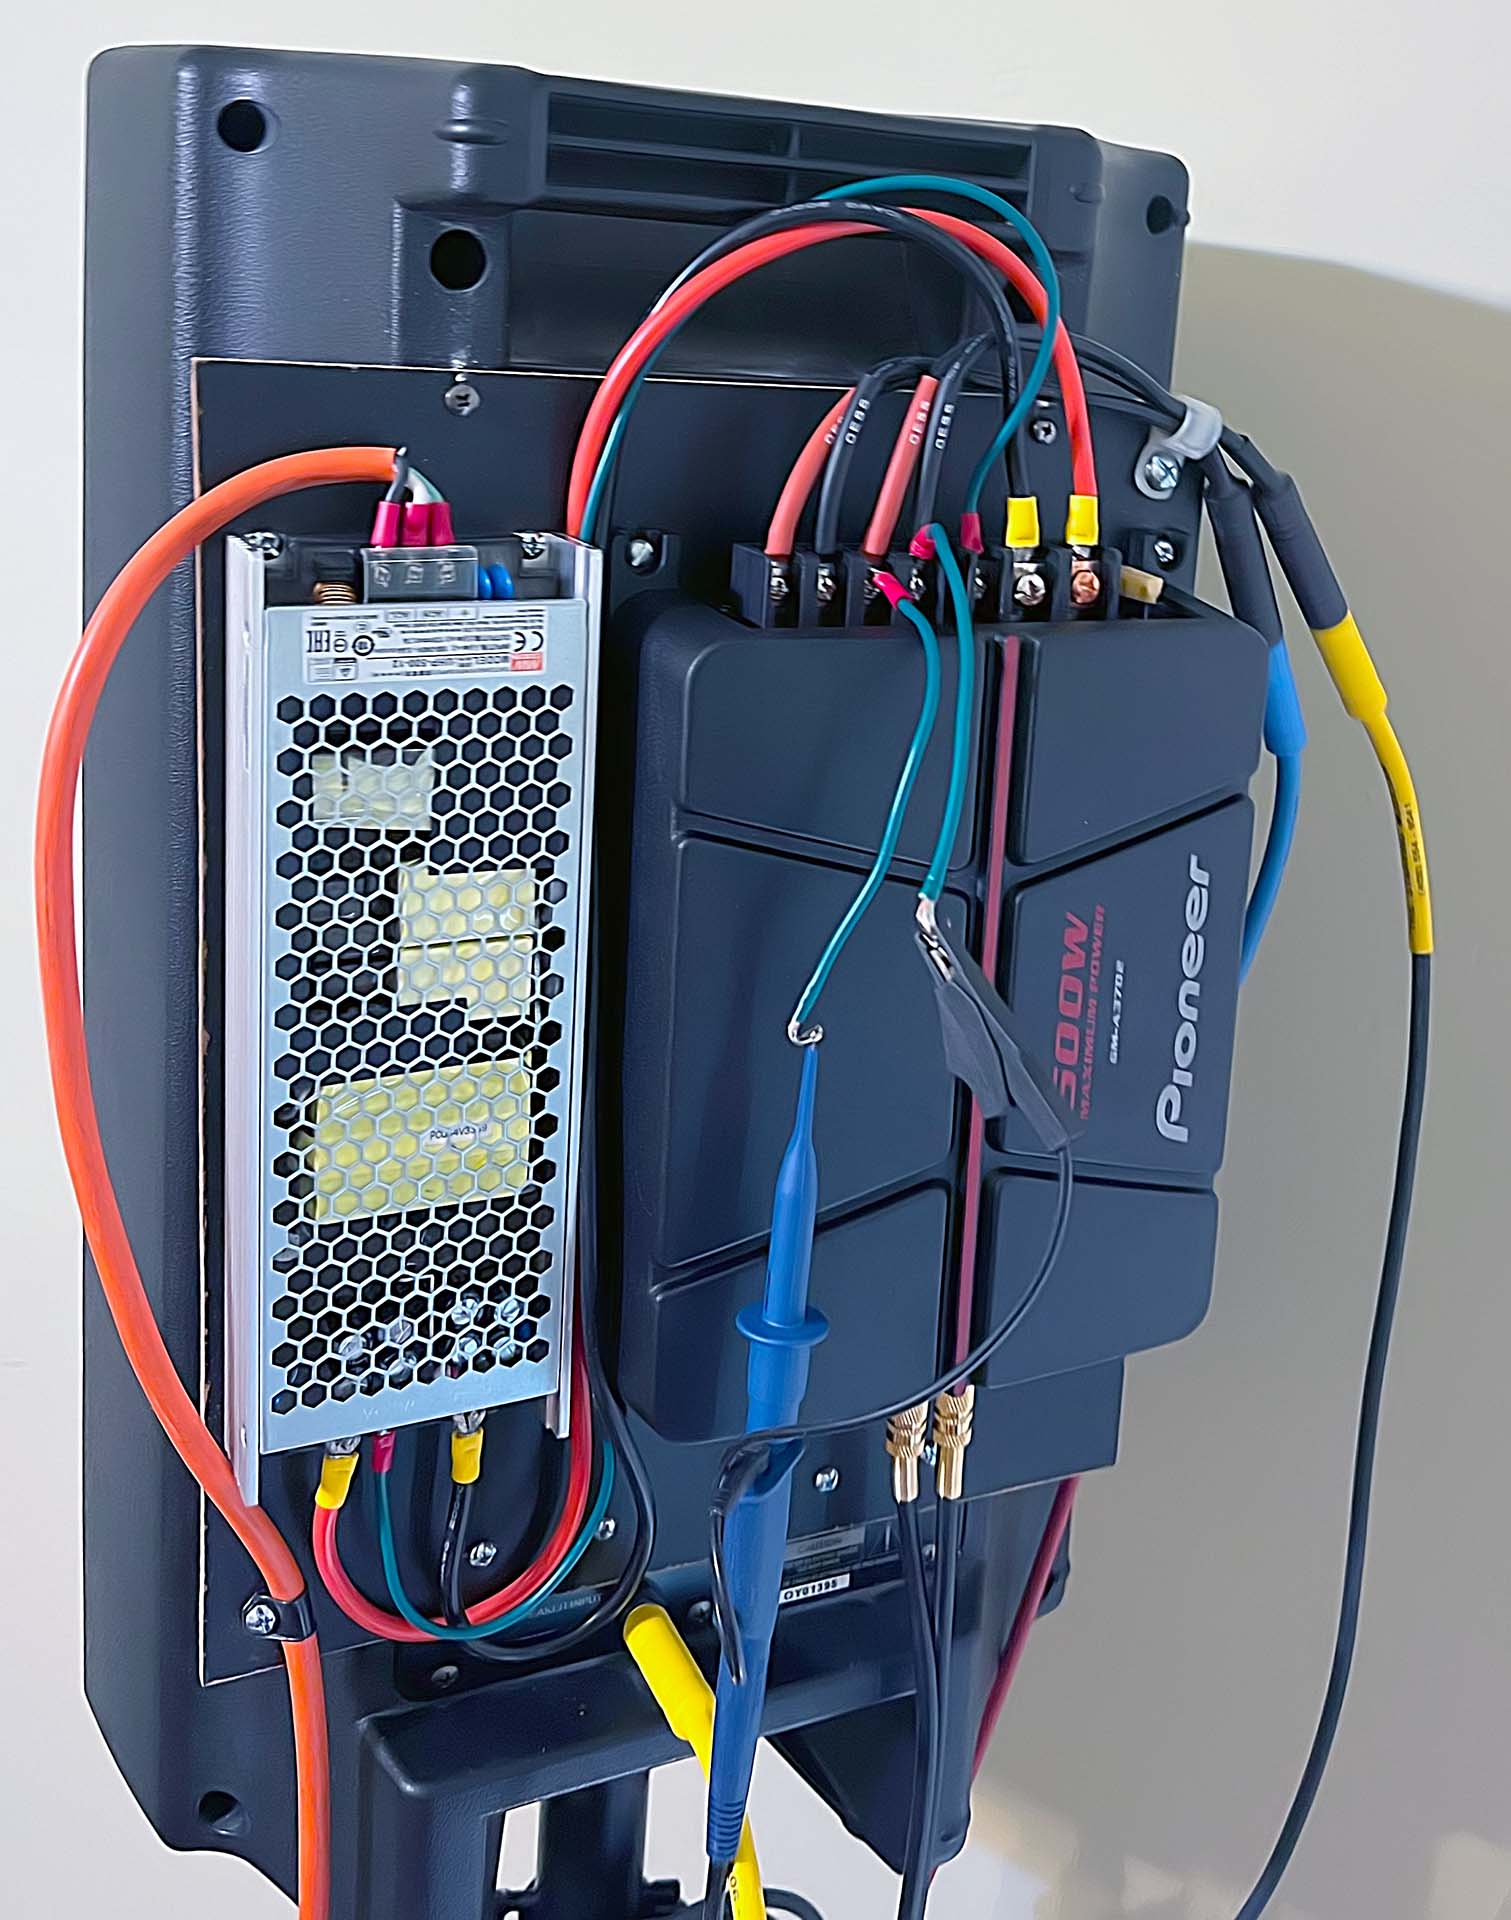
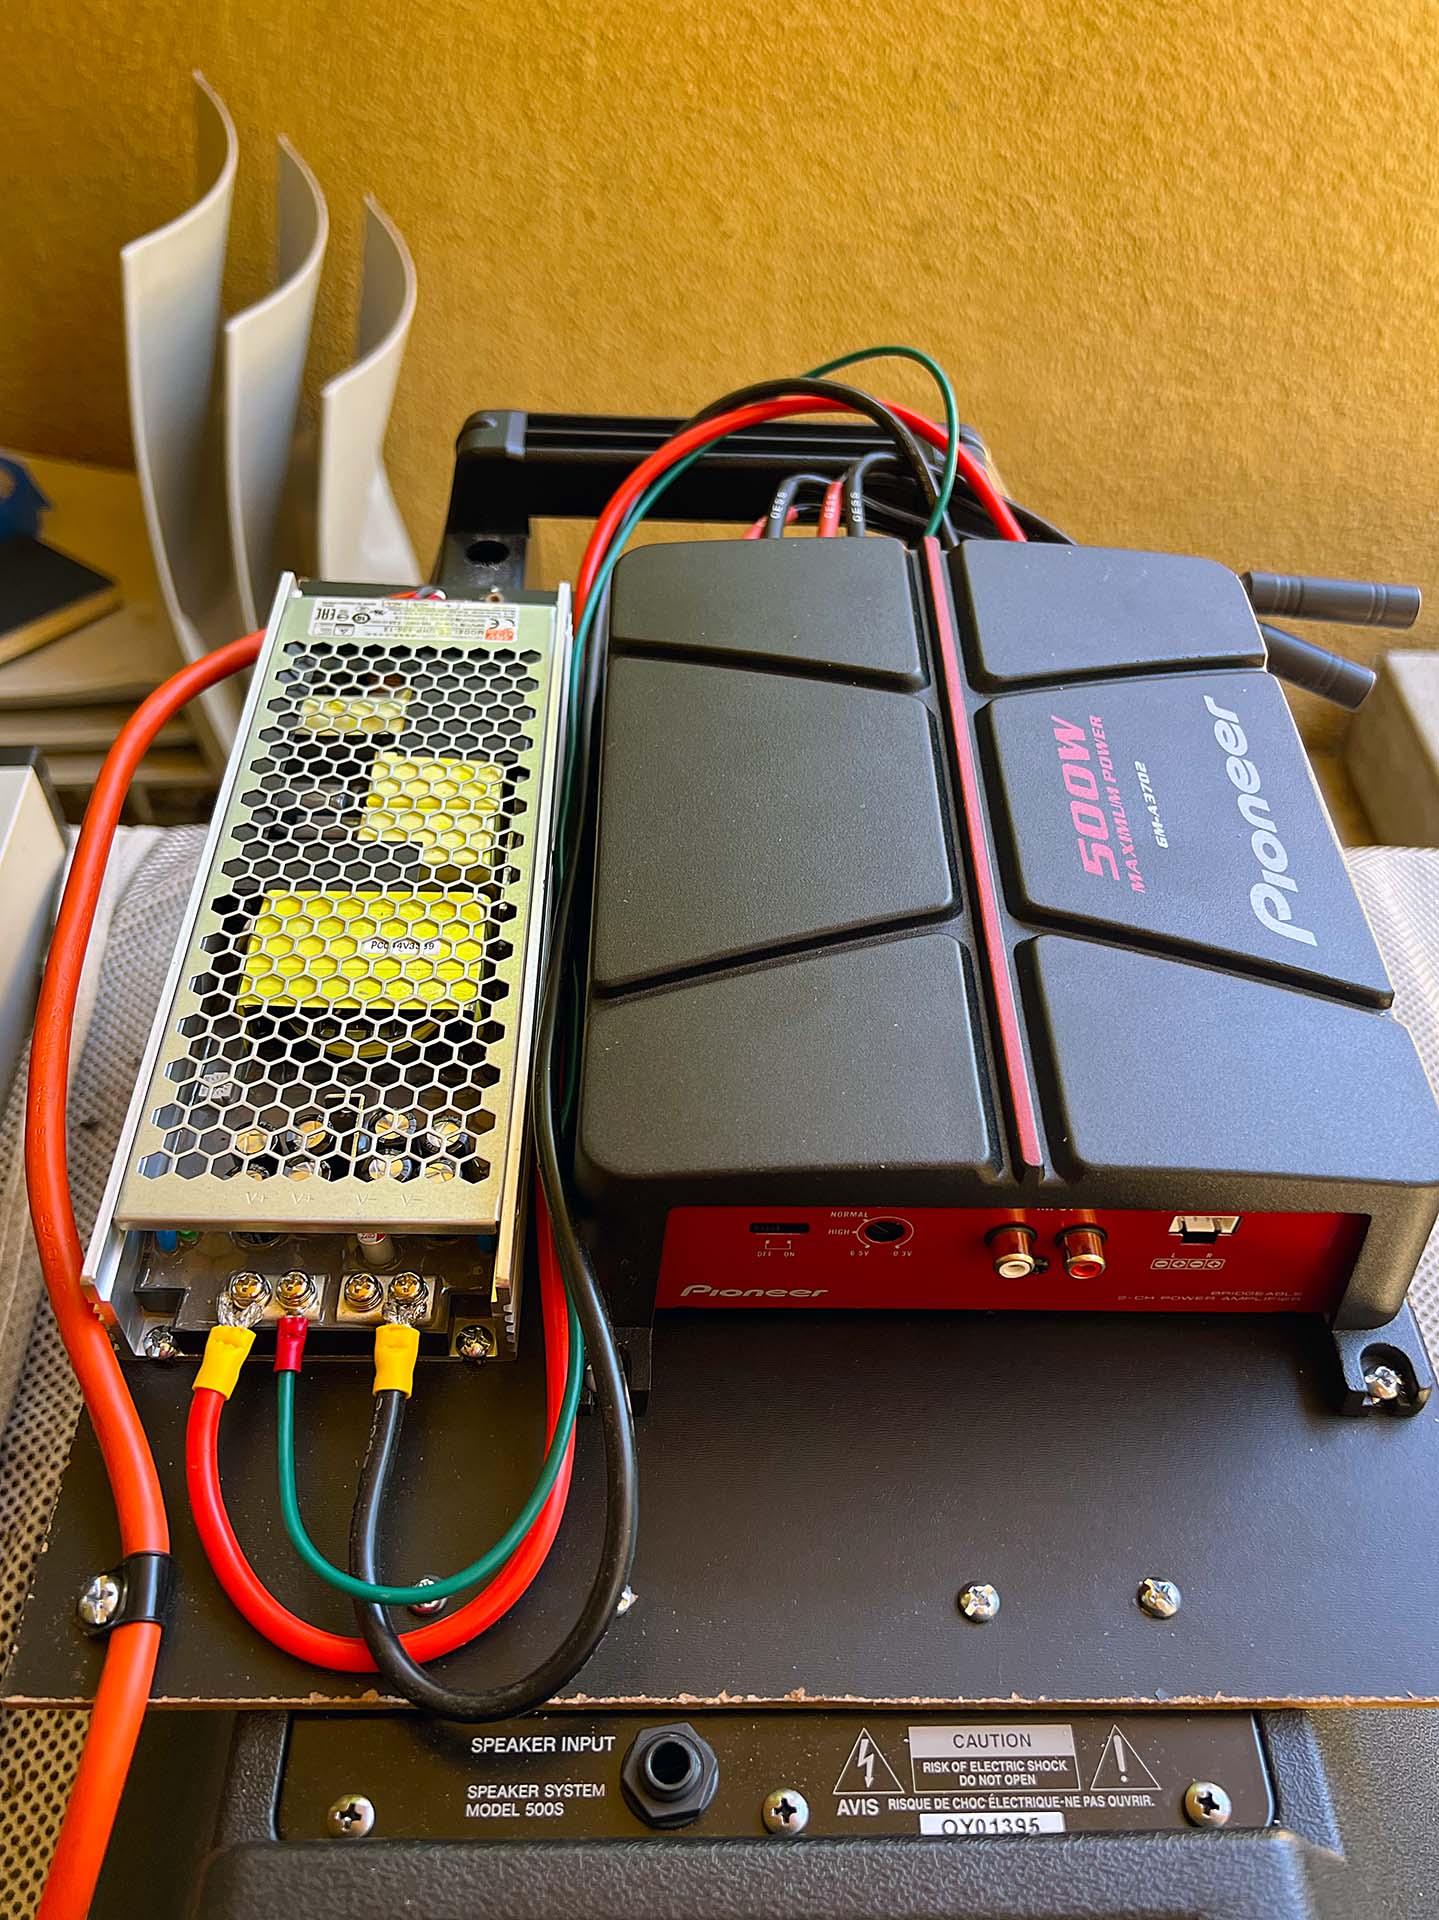
The Yamaha Stagpas 500 system meets many of the requirements for use as a studio monitor: It’s large but mobile and has good sound. These speakers without the original mixer are commonly found on eBay as well. However, the included powered mixer is way too noisy and offers many inputs that are not needed for my media production. So, this custom-build article presents how I replaced the powered mixer with an OEM power supply and 500-watt car amplifier. The custom panel supporting the new electronics is easily interchangeable with the original power mixer and can still be used as a PA system.

Final multimedia editing station with Yamaha Stagepas 500 converted to studio monitors. The original Yamaha-powered mixer with a noisy fan was replaced with a custom panel supporting a Mean Well UHP-500-12 convection-cooled 500-watt power supply and a Pioneer GM-A3702 500-watt car amplifier. The original mixer and the new custom panel are interchangeable, so the Yamaha system can still be used as a PA system with its original mixer.
Performance Testing
Below, I perform a basic performance test on the studio monitor configuration using an oscilloscope and a 20 Hz to 20 kHz sweep frequency tool I created for a previous blog post on this site: adalm2000 audio_sweep.
Scope probes are attached to the amplifier’s right speaker output. The amplifier input is driven by the PC’s audio output and buffered by a portable FMX-42 (Azden) mixer. In some of my configurations where PC is used for audio input, the Azden monitor output can also be used with these DIY studio monitors (using a 1/4″ Tip-Ring-Sleeve TRS stereo female plug).

I perform basic voltage tests on the UHP-500-12 (Mean Well) 500-watt 12-volt power supply while connected to the power amplifier. I connect scope probes to the power supply’s positive/negative terminals. The photos below show the operating voltage (12.09 Vdc) and AC switching power supply characteristics (195 kHz at 19.8 mV) while under load from the amplifier.


Mounting New Amplifier Assembly to Speaker
Working backward through this project, these photos show how the wood panel is attached to replace the power mixer. For the bottom portion of the new wood panel, I used a pair of old cabinet cupboard latches that are similar in shape to the original mixer’s tongues. Any other pair of “tongues” – perhaps made of the same wood making the back panel – could be used instead of these latches. Note the stack of washers mounting the latches so the tongues fit the speaker. For the top portion, I used machine screws mounted directly into the speaker’s plastic body.

Wood panel bottom view
New panel mounted to bottom using the cabinet latches

New panel screwed into top using machine screws